
No-Bake Biscoff Cheesecake Cups (High-Protein Recipe)
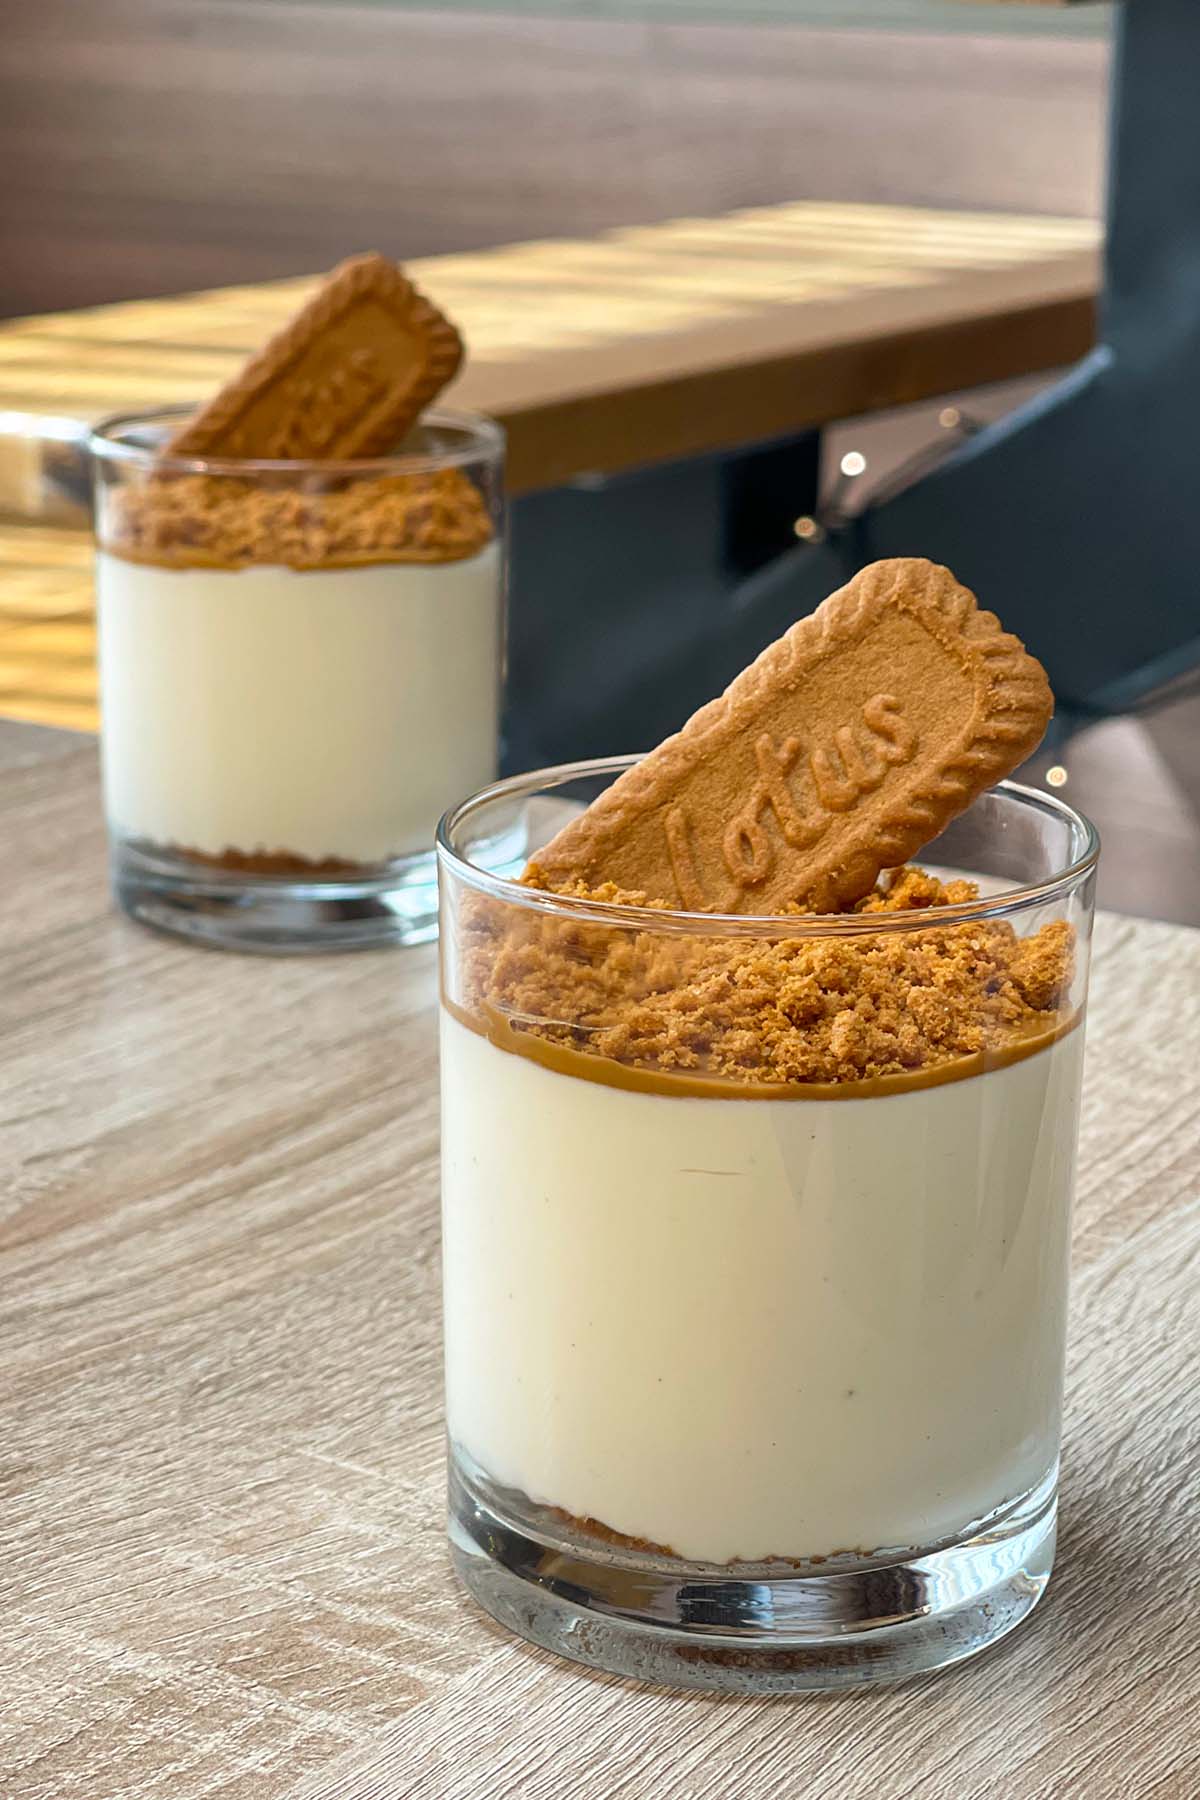
We were getting tired of having the same expensive protein bars and boring protein shakes as our afternoon snack. So we wanted a homemade alternative that was just as easy to make, but actually felt like a proper dessert. These no-bake Biscoff cheesecake cups are our simple take on a high-protein dessert recipe.
We’ve always been big Biscoff fans, and we like using it in macro-friendly desserts because the caramelized, slightly spiced flavor works really well with creamy fillings. These cups have a crunchy Biscoff cookie base, a smooth and creamy protein cheesecake filling, and Biscoff spread with cookie crumbs on top.
Nutrition (Per Serving – Recipe Makes 2 Servings)
|
Calories |
Carbs |
Fat |
Protein |
|---|---|---|---|
|
468 kcal |
28 g |
21 g |
39 g |
Calories and macronutrients are per serving and are approximate. Actual values may vary depending on the specific ingredients used. For informational purposes only.
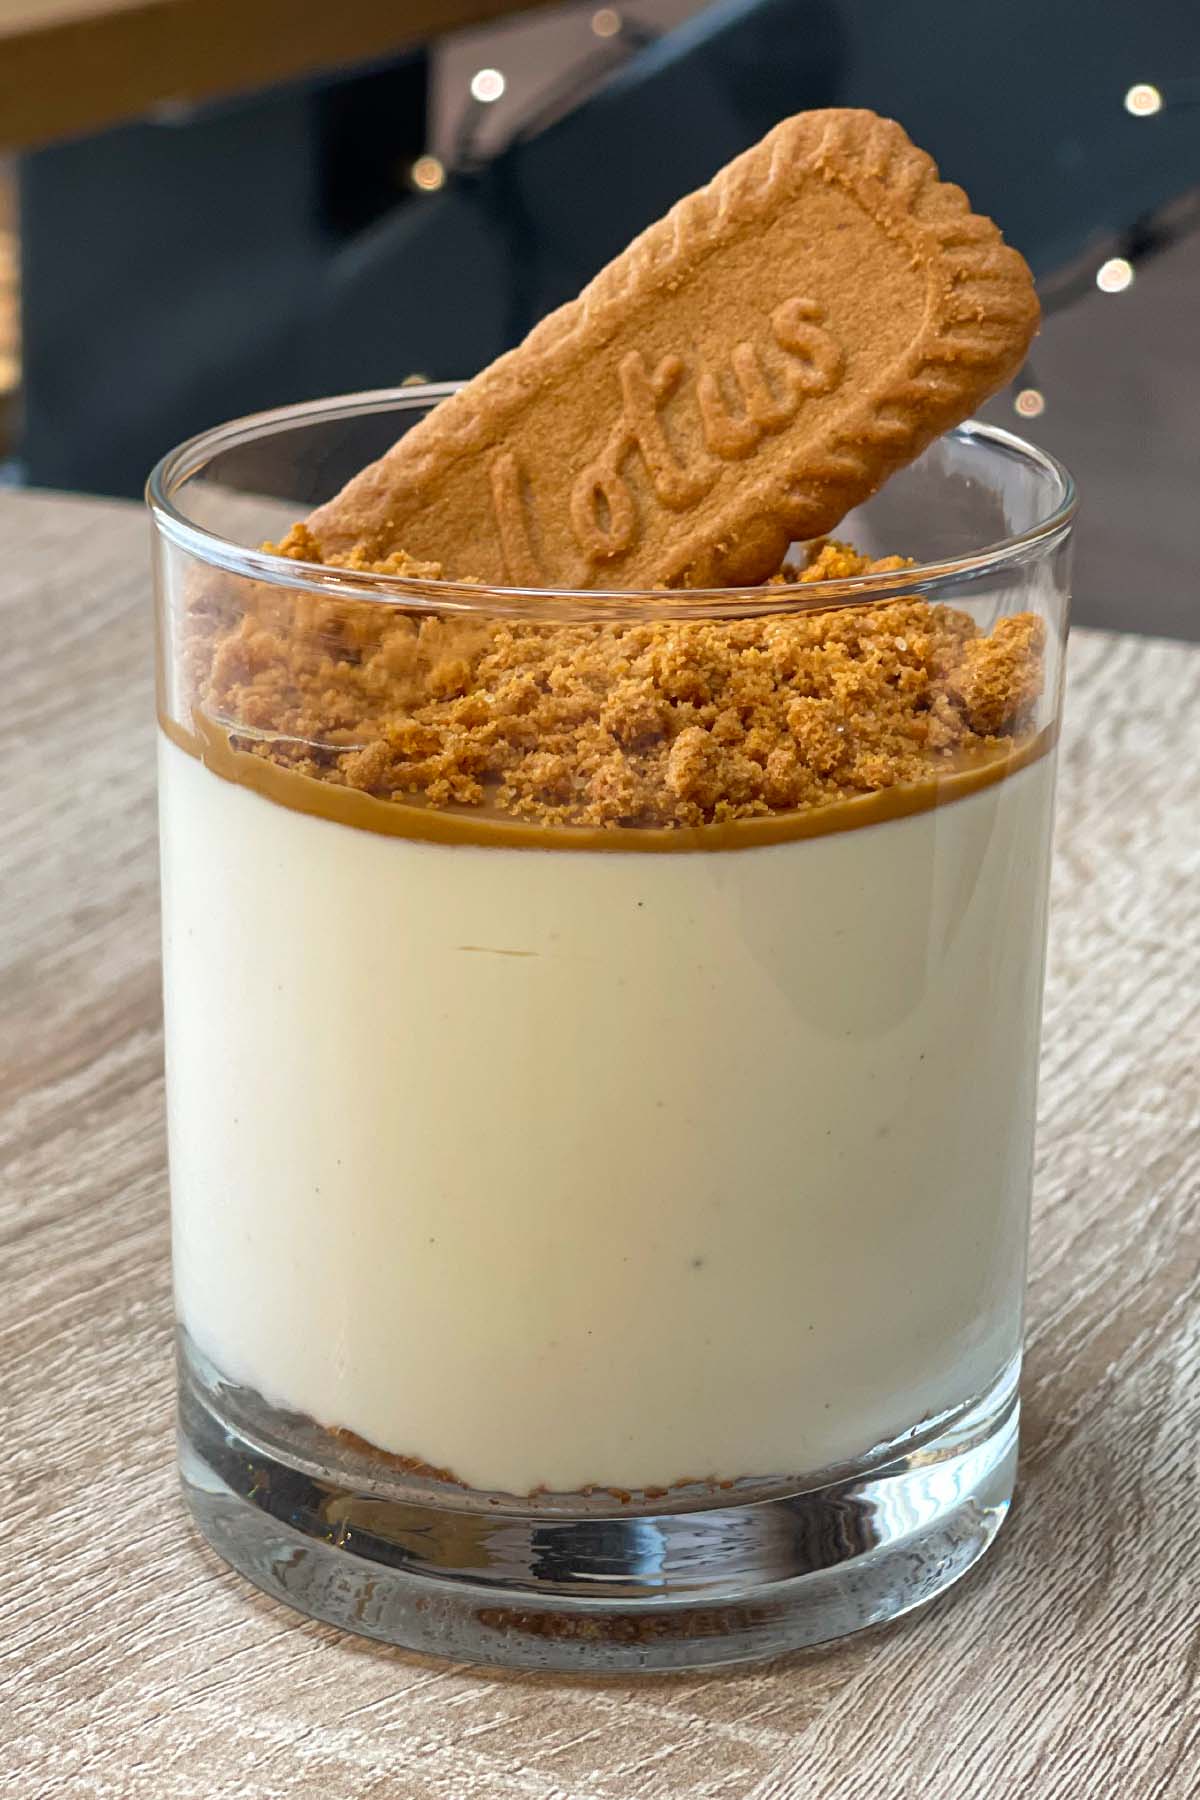
Why Choose These Cheesecake Cups?
High-Protein Satisfaction
With around 39g of protein per serving, these no-bake Biscoff cheesecake cups are a satisfying and filling option when we want something sweet.
Effortless & No-Bake
There’s no need to turn on the oven or deal with a cheesecake pan here. We blend the filling, layer everything into glasses, and let the fridge do the rest. This makes the recipe especially handy when we want cheesecake without the usual baking process.
Perfect for Meal Prep
This recipe is easy to scale up depending on how many servings we want. We often make a triple batch so we have enough desserts for the week. Since the cheesecake is already portioned into individual glasses, we can simply grab one from the fridge whenever we want a sweet snack.
What You Need for This Recipe
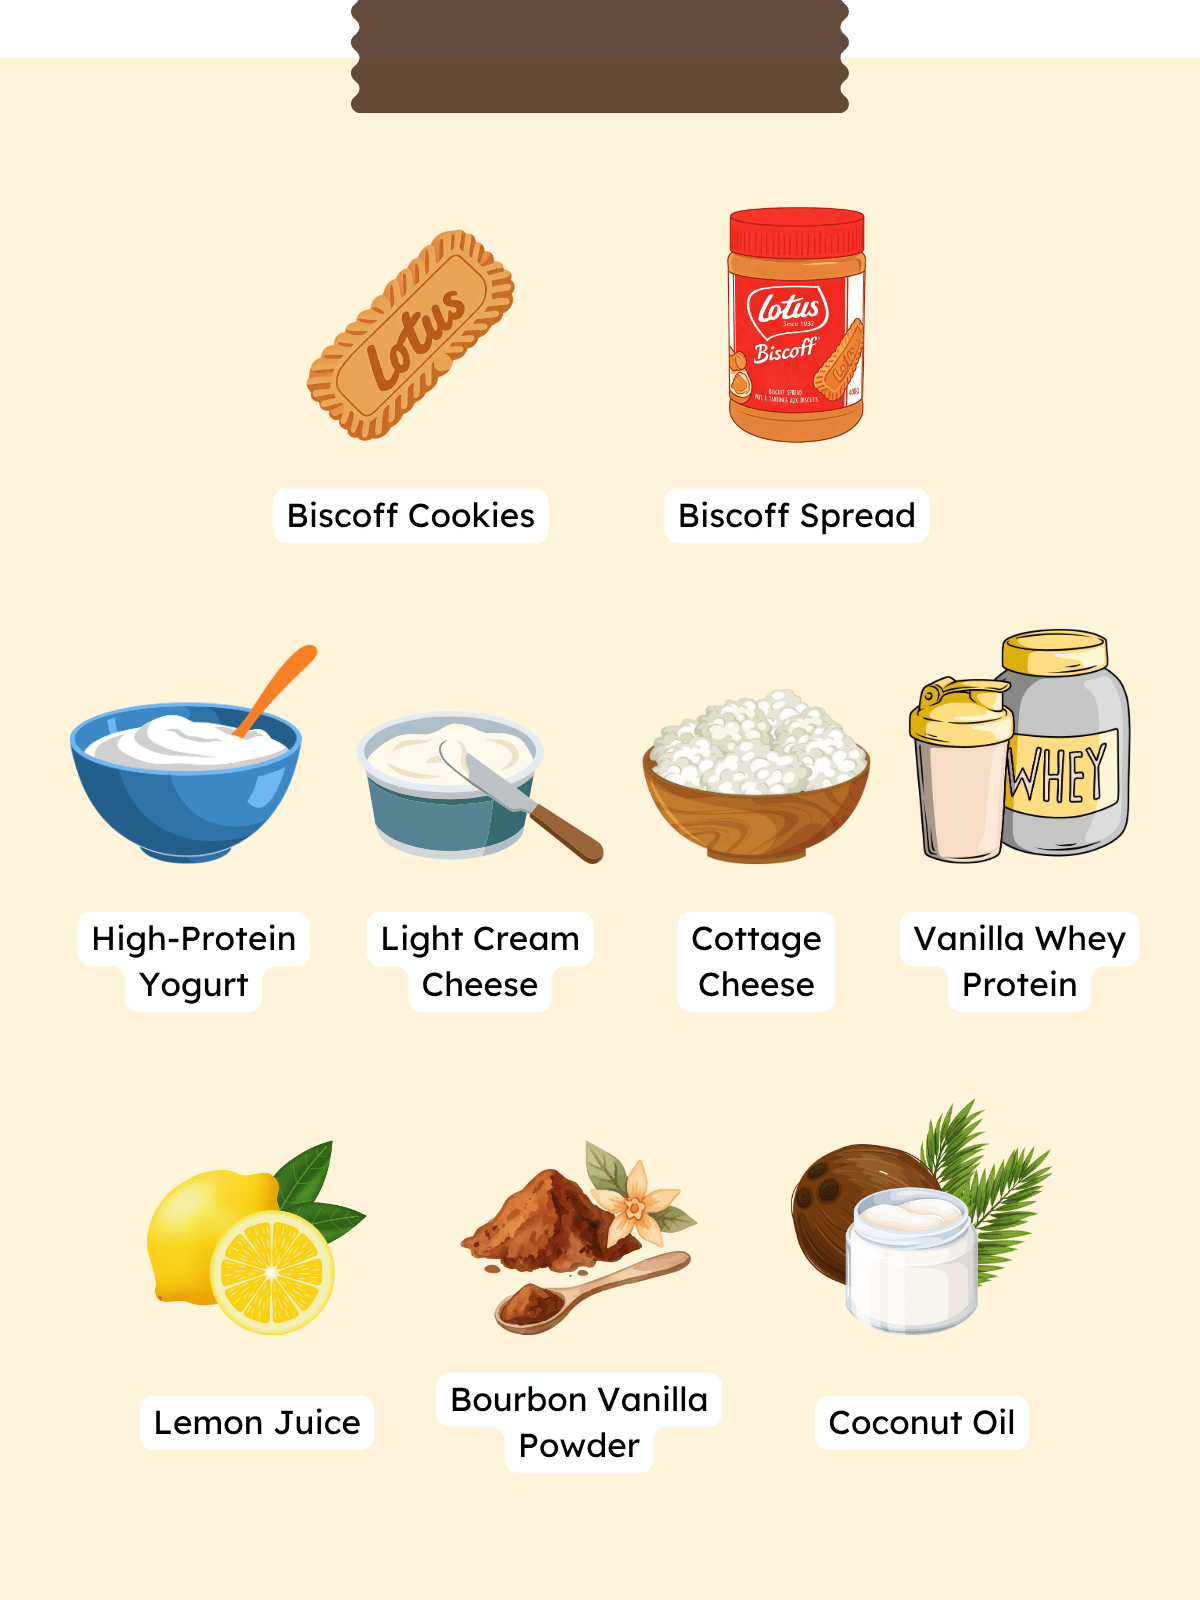
Here you can see the ingredients for these no-bake Biscoff cheesecake cups. See the recipe card below for the full list of ingredients with all quantities.
Ingredients Explained
-
Lotus Biscoff Cookies & Spread: the main source of the caramelized Biscoff flavor we love.
-
Coconut Oil: helps bind the cookie crumbs together so the base stays firm in the glass instead of mixing into the cheesecake filling and getting soggy.
-
Cottage Cheese: gives the filling a thick and creamy texture without needing gelatin. And don’t worry, you won’t get a savory cottage cheese taste in the finished dessert.
-
Skyr or Greek Yogurt: adds extra creaminess and protein to the filling.
-
Light Cream Cheese: gives the filling that familiar cheesecake flavor and makes it a little richer.
-
Vanilla Whey Protein: adds sweetness, vanilla flavor, and protein while also helping the no-bake filling set.
-
Lemon Juice: optional, but we like adding it. It balances the richness of the dairy and Biscoff without making the cheesecake taste lemony.
- Bourbon Vanilla Powder: intensifies the vanilla flavor in the filling.
Recipe Variations
You can easily customize this recipe for no-bake Biscoff cheesecake cups to match your own taste.
-
Vanilla Whey Protein: if you can find Speculoos-flavored whey, give it a try. It adds even more of that warm, spiced Biscoff-style flavor to the cheesecake filling.
- Coconut Oil: butter works just as well for the Biscoff cookie base if that’s what you have on hand.
Any changes to the ingredients may affect the macronutrient values. If you modify the recipe, the nutritional values should be recalculated accordingly.
How to Make Biscoff Cheesecake Cups
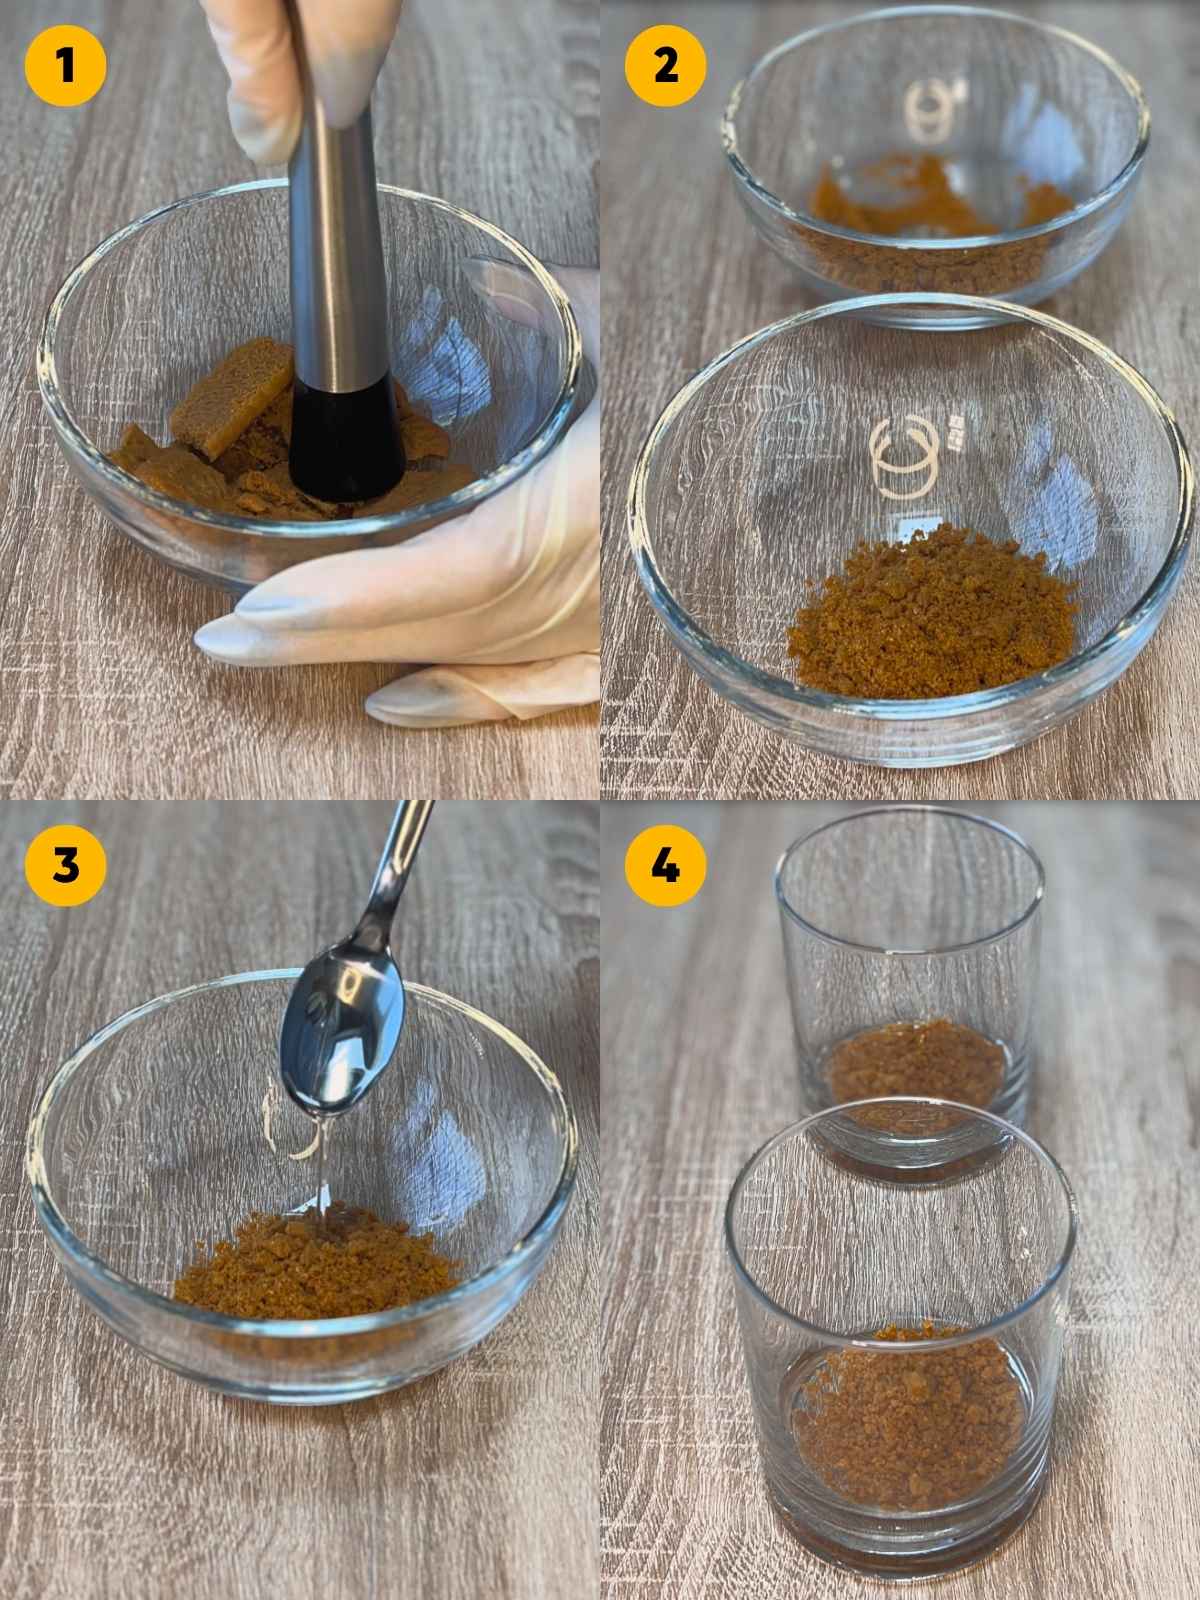
Images 1–4: Make the Base
Crush the Biscoff cookies into fine crumbs and mix half of them with the melted coconut oil. Divide the mixture between 2 glasses and press it down firmly to create an even base. We like using a cocktail muddler for this, but the back of a spoon works too. Chill for about 10 minutes.
Images 5–10: Make the Filling
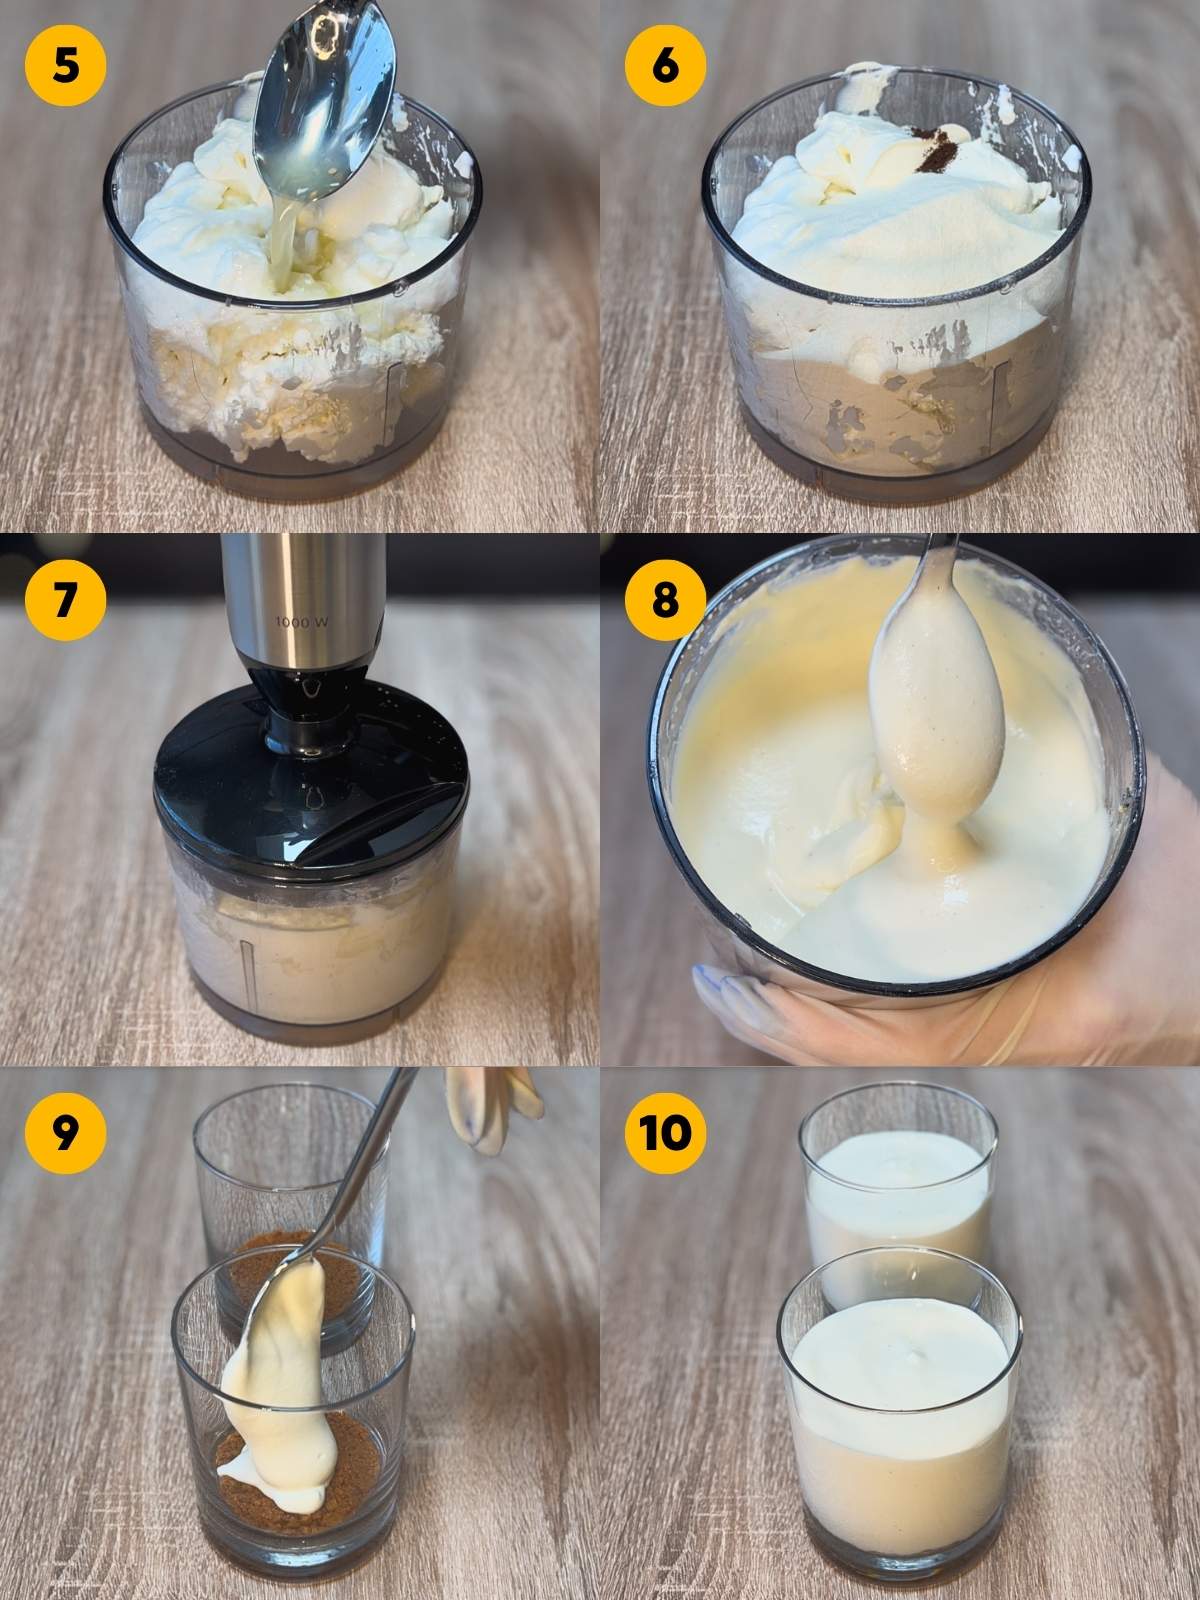
Add all the filling ingredients to a blender. Blend until completely smooth and creamy. Take your time here so there are no cottage cheese lumps left. Gently divide the filling between the glasses without disturbing the Biscoff base. Refrigerate for at least 2 hours, or overnight for a firmer no-bake protein cheesecake.
Images 11–16: Add the Topping
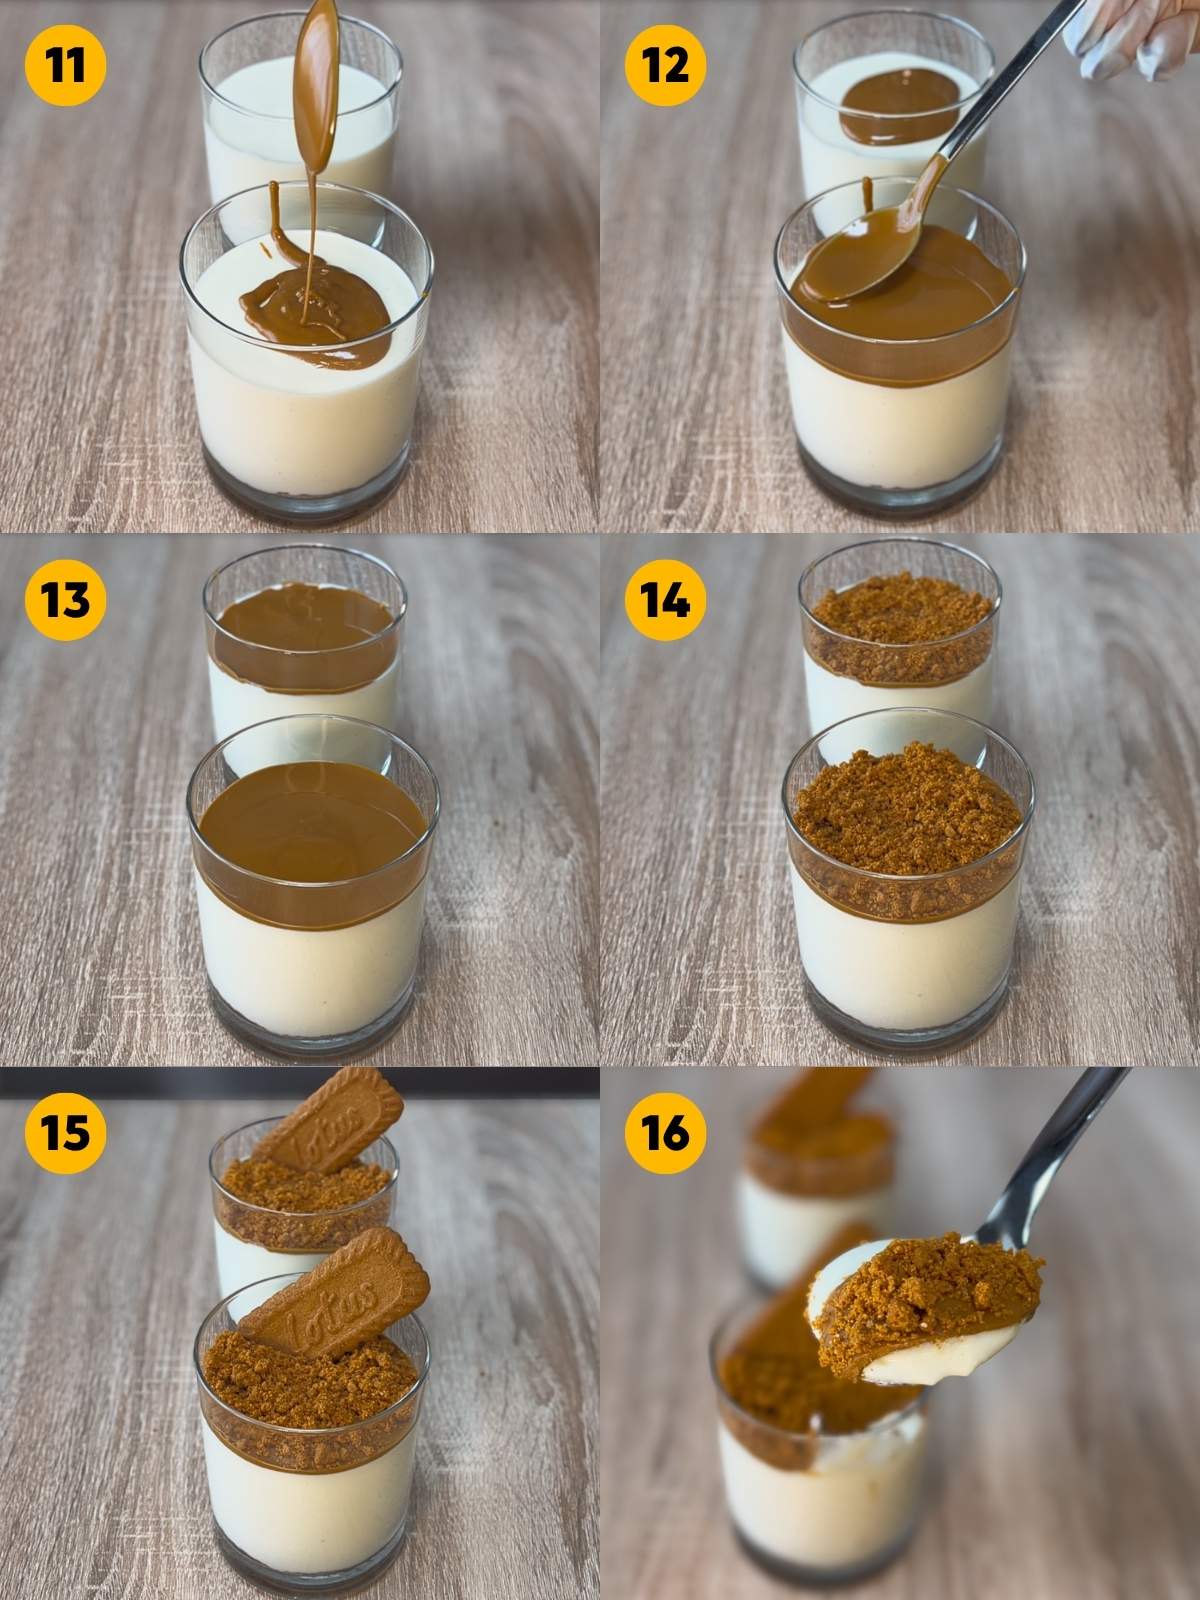
Warm the Biscoff spread briefly until it becomes soft and easy to drizzle. Divide it between the glasses and finish with the remaining Biscoff crumbs and a whole Biscoff cookie.
JuicyMacros Recipe Tip
- Keep it Brief: warm the Biscoff spread for only about 10 seconds in the microwave, just until it becomes soft enough to drizzle. If it gets too hot, it can soften the chilled cheesecake layer underneath and affect the clean layers.
How to Store
-
Store the cheesecake cups covered in the fridge for up to 4 days.
- For the best texture, add the whole Biscoff cookie and cookie crumbs shortly before serving so they stay crunchy.
More No-Bake Dessert Recipes
No oven required! Keep your sweet tooth happy with these easy, protein-packed dessert recipes:
If this recipe was a hit for you, consider leaving a star rating and letting us know your experience in the comments below. 🙂
Recipe: No-Bake Biscoff Cheesecake Cups

No-Bake Biscoff Cheesecake Cups (High-Protein Recipe)
2
servings15
minutes0
minutes468
kcal28
g21
g39
gThese easy no-bake Biscoff cheesecake cups satisfy any sweet tooth without baking. The creamy cottage cheese and Skyr filling packs around 39g of protein per serving, layered with a crunchy cookie base and warm Biscoff drizzle for the perfect macro-friendly treat!
Keep the screen of your device on
Ingredients
- Base
2 Biscoff Cookies, crumbled
5 g Coconut Oil, melted
- Filling
300 g Cottage Cheese
100 g Skyr / Greek Yogurt (0.2% fat)
50 g Light Cream Cheese
30 g Vanilla Whey Protein
1 tbsp Lemon Juice (optional)
0.25 tsp Bourbon Vanilla Powder
- Topping
20 g Biscoff Spread, melted
2 Biscoff Cookies, crumbled
1 Biscoff Cookie
Directions
- Biscoff Base
Crush the Biscoff cookies into fine crumbs. Mix half of the crumbs with the melted coconut oil and divide between 2 jars or glasses. Press the crumbs down firmly with a cocktail muddler or the back of a spoon. Place in the fridge for about 10 minutes. - Blend the Filling
Add the Skyr, light cream cheese, cottage cheese, whey protein, lemon juice and bourbon vanilla powder to a blender or food processor. Blend until smooth and creamy, scraping down the sides if needed. - Chill to Set
Cover the jars and place them in the fridge for at least 2 hours, or overnight. The filling should be firm and well chilled before adding the topping. - Add the Topping
Warm the Biscoff spread until it becomes soft and easy to drizzle. Divide it between the 2 jars, then top with the remaining Biscoff crumbs and 1 whole Biscoff cookie per jar.
Recipe Video
Notes
- We used glasses with a capacity of 11.8 fl oz (350 ml).
- Storage
– Fridge: Store the cheesecake cups covered in the fridge for up to 4 days. Keep the Biscoff cookies on top until serving if possible, as they will soften over time. - *Calories and macronutrients are per serving and are approximate. Actual values may vary depending on the specific ingredients used. For informational purposes only.
Have you tried this recipe yourself?
Tag @juicymacros on Instagram and let us know.
Recipe FAQs
Can no-bake cheesecake be frozen?
We don’t recommend freezing these no-bake cheesecake cups. The cottage cheese, Skyr, and cream cheese filling can change texture after thawing and may not be the same as when it’s just chilled.
How do you make a cottage cheese no-bake cheesecake taste sweet instead of savory?
We use vanilla whey, and bourbon vanilla to give the filling its sweet, creamy cheesecake flavor. Blending also removes the typical cottage cheese texture, leaving you with a perfectly smooth dessert.
How long does no-bake cheesecake need to set?
We recommend chilling the cheesecake cups for at least 2 hours before serving. However, the longer they chill, the better the flavor and consistency.



)